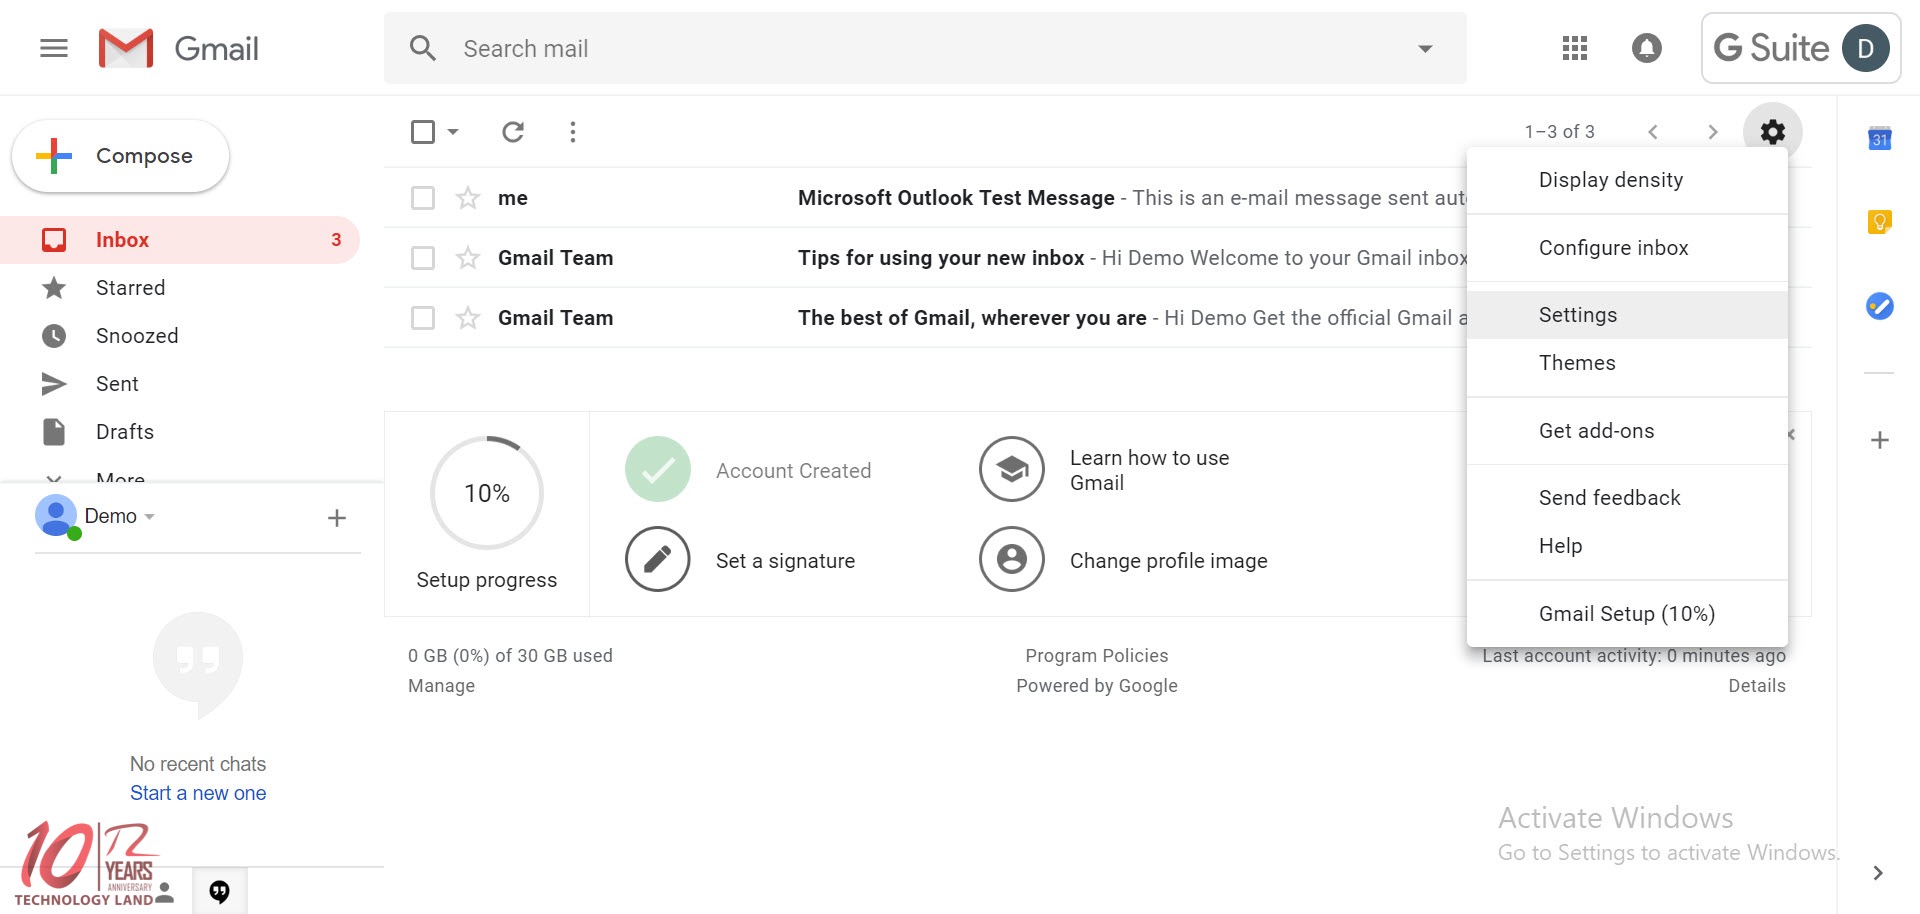
จากนั้นเลือกกด Settings

1. เลือก Enable POP for all mail
2. เลือก Enable IMAP
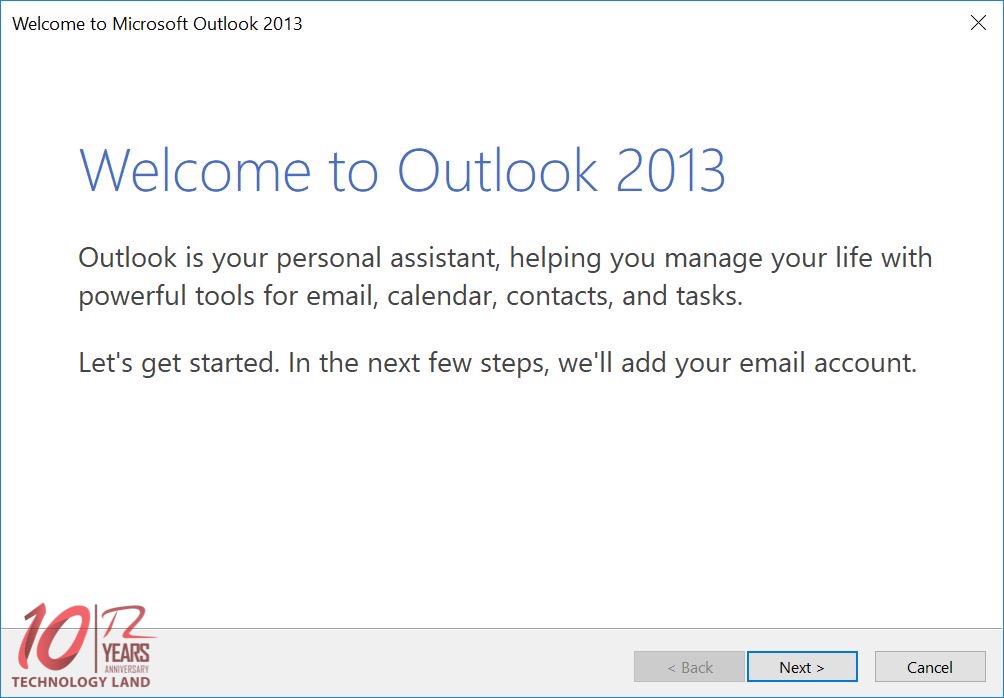
จากนั้นกด Next
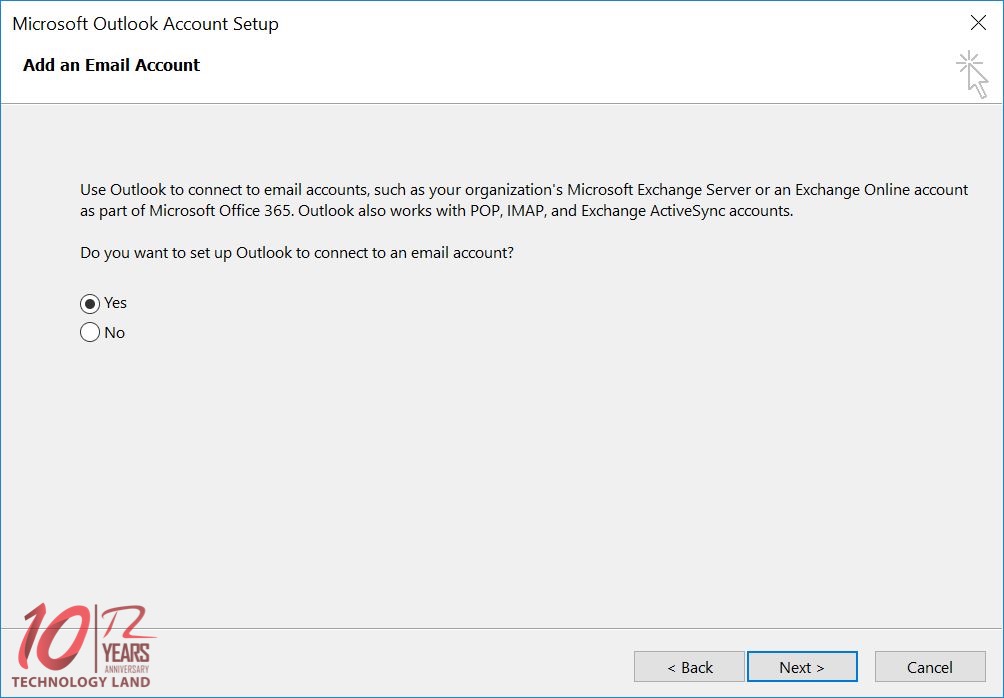
จากนั้นกด Next
จากนั้นกด Next
จากนั้นกด Next
จากนั้นกด Next
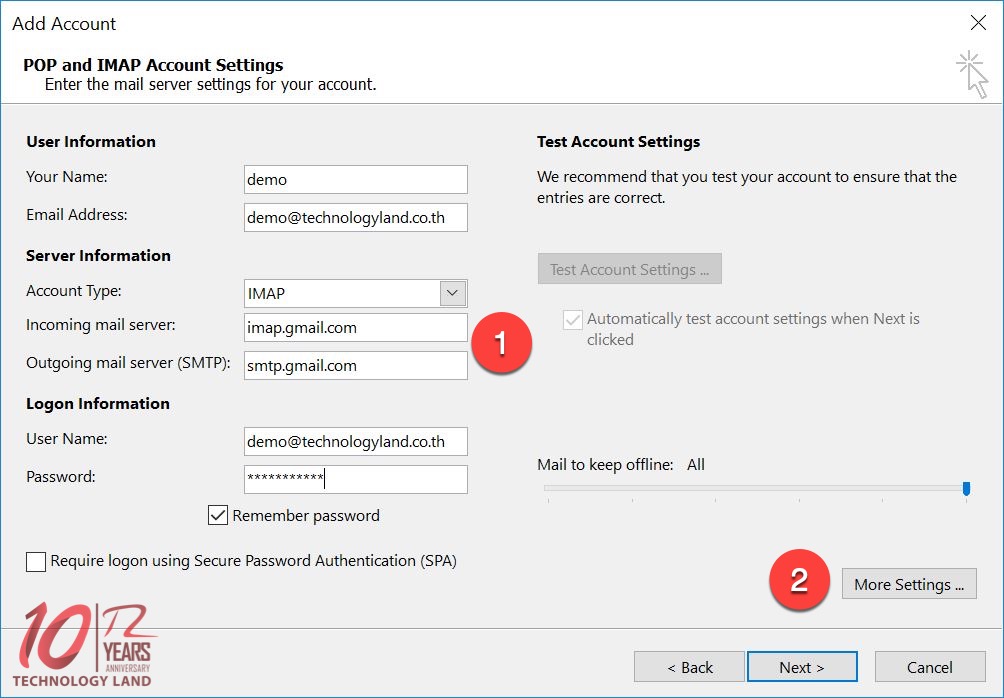
1. ใส่ชื่อเซิฟเวอร์ของ gmail
Incoming mail server : imap.gmail.com
Outgoing mail server : smtp.gmail.com
2. เมื่อใส่ข้อมูลครบแล้ว เลือก More Settings ..
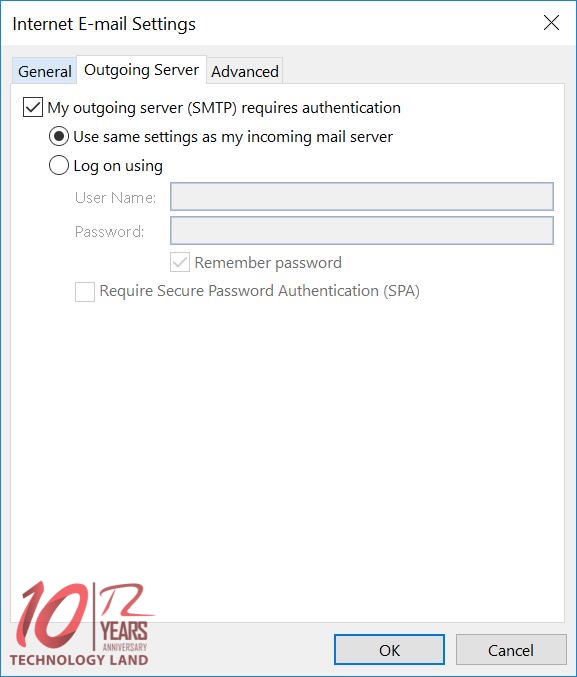
แล้วติ๊กตามรูปภาพ
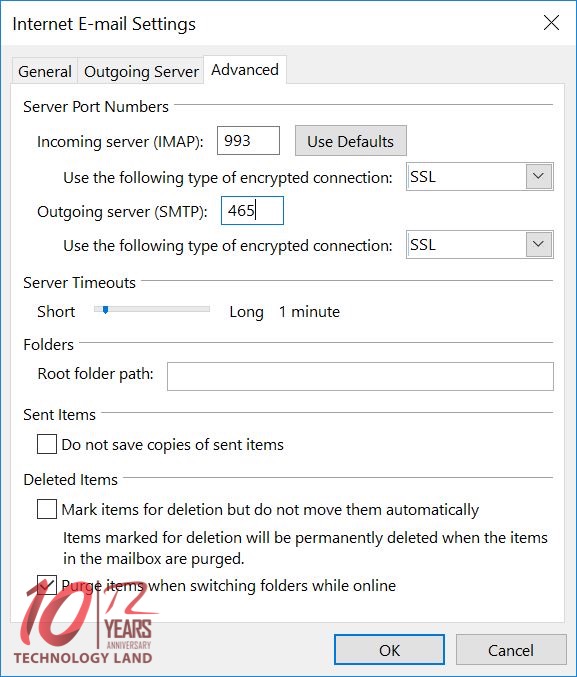
ให้ปรับ Port และ Type เป็น
Incoming : 993 , SSL
Outgoing : 465 , SSL
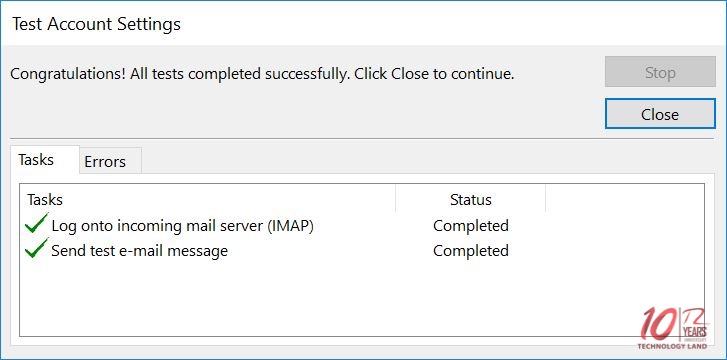
จะแสดงตามรูปภาพ เป็นอันเสร็จสมบูรณ์
Click to rate this post!
[Total: 0 Average: 0]